
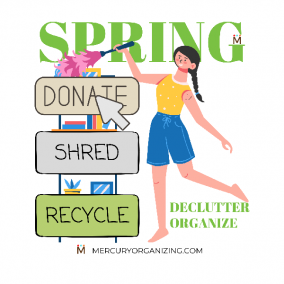
Effortless Spring Cleaning: Your Step-by-Step Plan
Tax season may be over for some folks, and now, hopefully, you're waiting for the refund. Phew. One task is done, but now onto another. Getting your home ready for spring cleaning is no easy task. But before you start, it's important to create a plan for each area of your home. You are not cleaning a home when it is full of clutter. It's difficult to wipe down surfaces when your counters are cluttered with trinkets or products. So, to ensure success, create a plan to tackle your spring cleaning room by room and break up the task into manageable steps.
Cleaning your home is easy only after you have removed all the clutter, but by doing it room by room, you’ll have a better chance of getting it done. What should you include in your plan? A plan should include the following steps: Decide what to keep, donate, and toss. I suggest you create your spring cleaning to-do list taking these three steps for each room. Here are the steps you will take for each room.
Decide which rooms you will work on first.
Which room will you tackle first? Maybe a guest is coming to stay soon, and you’ll need the extra bedroom. So pick a space that is completely available first, or even one that is in dire need of organizing.
Create a timeline:
It can be helpful to set goals for how much you want to accomplish each day or week. This will help you stay on track and make steady progress towards a clutter-free home. Consider your schedule and determine how much time you can devote to the spring cleaning campaign.
Go room by room:
Describe each room’s current condition and describe how you would like to see it. Imagine how it will function for you. The following list has your general rooms in the average home, but you may want to add or remove any rooms if you need to.
- Living Room
- Entryway
- Kitchen
- Bathroom(s)
- Master Bedroom
- Second bedroom
- Pantry
- Dining Room
- Attic
- Basement
- Garage or Shed
Remove the clutter
Start by editing and removing those items that you don’t need or want from each room. Take away anything you know you don’t want anymore. Toss or recycle what you can’t repair or use any longer. Donate anything that can be useful to others.
Put like items together
Now that you’ve removed the excess from each room, work with what you have left and put items together. Once you know how much you have, you’ll be able to find a place to store everything.
Organize and find a home for everything
When you've decided on what you’re keeping and what you're storing, you can get to the final phase and store your items.
Get the right container
Another important aspect of organizing is finding the right storage solutions for the items you’re keeping. This might mean investing in new storage containers, shelves, or other organizational tools that will help you keep everything in its place.
To help you stick with a plan, I created a checklist and planner. Just download, print, and use the cleaning and organizing checklist to help you stay on track. Mark off the rooms as you complete them.
Remember, decluttering, organizing, and cleaning for spring is a process that takes time and effort, but the result is a relaxed, tidy, organized, and hopefully happy space. So don't be afraid to take it one step at a time and appreciate your progress along the way. I made a list of items you can easily get rid of without any stress or worry about tossing or donating them.
Start by decluttering using this checklist: Click to Print out your PDF planner
Bathroom:
- Expired medications
- Old makeup
- Broken jewelry
- Unused toiletries (soaps, lotions)
Bedroom:
- Out-dated bedroom decor
- Bedside table expired lotions, medications
Clothes Closet:
- Outgrown clothes (donate good condition items)
- Flimsy hangers
- Worn-out shoes (donate good condition shoes)
Linen Closet
- Old linens (sheets, pillowcases)
- Old worn-out comforters
Family Room Closet:
- Games/puzzles with missing pieces
- Broken toys
- Duplicate items (unless essential, like flashlights)
- Outdated electronics
- Cleaning products (harsh chemicals, expired)
- Unused candles
- Packets of unknown contents
- Old decor (dusty, outdated)
- Old, water bottles and excess mugs
- Everything in the junk drawer
Garage/Storage:
- Outgrown sports equipment
- Old magazines
Kitchen:
- Old and expired food
- Unused cleaning products
- Duplicate kitchen tools (unless essential)
- Old water bottles and excess mugs
Office:
- Shredded paperwork
Utility Closet:
- Games/puzzles with missing pieces
In conclusion, as tax season wraps up and you're hopefully anticipating a refund, it's time to shift your focus to spring cleaning. Cleaning is much easier in a clutter-free home. Begin by setting a timeline to keep yourself on track and make steady progress. As you go through each room, remove clutter, group similar items together, and find a home for everything you're keeping. Invest in storage solutions as needed, and use our checklist and planner to stay organized. Remember, spring cleaning is a process that takes time and effort, but the result is a more relaxed and organized living space.
Click to Print out your PDF planner
Apr 16, 2024 by
- share: